Week 9: I2C + Controlling Ableton from Arduino
This week, I tried communicating an RGB sensor and capacitive sensor to Ableton Live, to work for my Sound Flowers project in Physical Computing.
I2C Sensor (Failed)
First of all, I tried using SparkFun's APDS-9960 which is an I2C sensor that can sense RGB values and proximity to test serial communications with I2C.

However, it didn't work. Things I've checked were:
- Wiring (SDA -> A4, SCL -> A5, power, ground)
- Wire connections via multimeter
- Serial port connection
Another possibility is there is a problem with the sensor itself. I don't want to believe that possibility since the sensor was a brand new one, but nothing else explains this...
Capacitive Sensor (Success)
Making a capacitive sensor was relatively easy. I just connected a copper tape with a 910k resistor to the D2 and D4 pins. In the code, I used the CapacitiveSensor.h library. This library lets you measure the electrical capacitance by sending and receiving signals through 2 pins.


Possible problems

After testing the connection, I found that there were some problems with my initial plan to make Sound Flowers.
- Discrepancy: One problem was that the discrepancy between the maximum value and minimum value was too large. For example, when I pinched the copper tape firmly the measurement went high to about 10000, while being around 10~20 in the normal state.
I guess I can fix this problem by using the map() function when I apply the sensing values to a project. Right now, I am planning to use the capacitor values as MIDI Velocity while assigning fixed MIDI values to each leaf. - Connecting two wires to the capacitive sensor: This is the most important problem - to activate the capacitive sensor, I have to SEND and RECEIVE using 2 wires per each leaf. However, this means that I have limited options to make the branches look subtle and thin. I have to find out a way to make the branches thin enough while maintaining connections to 2 wires.
This also means that I will have limited numbers of leaves connected to the arduino, since there are only 11 pins(D2~D12) in the Arduino Nano 33 IoT that I am using. I will have to find out if it is possible to connect more than 11 digital pins to the Arduino.
Arduino with Ableton Live (Success)
My next objective was to send my capacitive sensor's values to Ableton Live. Ableton has a Max for Live device that lets you receive values from Arduino by default, in the m4l connection kit. It uses a protocol called Firmata. This link explains how to use the m4l connection kit.
According to the official documentation, this code just receives all analog and digital inputs without needing further manipulation. I downloaded the Arduino code from the connection kit repository and tried uploading...
First attempt with Arduino Nano 33 IoT

In my first attempt, the code didn't compile. After searching, I found out this error comes out when I don't use the latest version of the IDE or the board is incompatible. Since I am using the latest version of the Arduino IDE, my Nano 33 IoT seemed to be the problem.
Second attempt with Arduino Uno
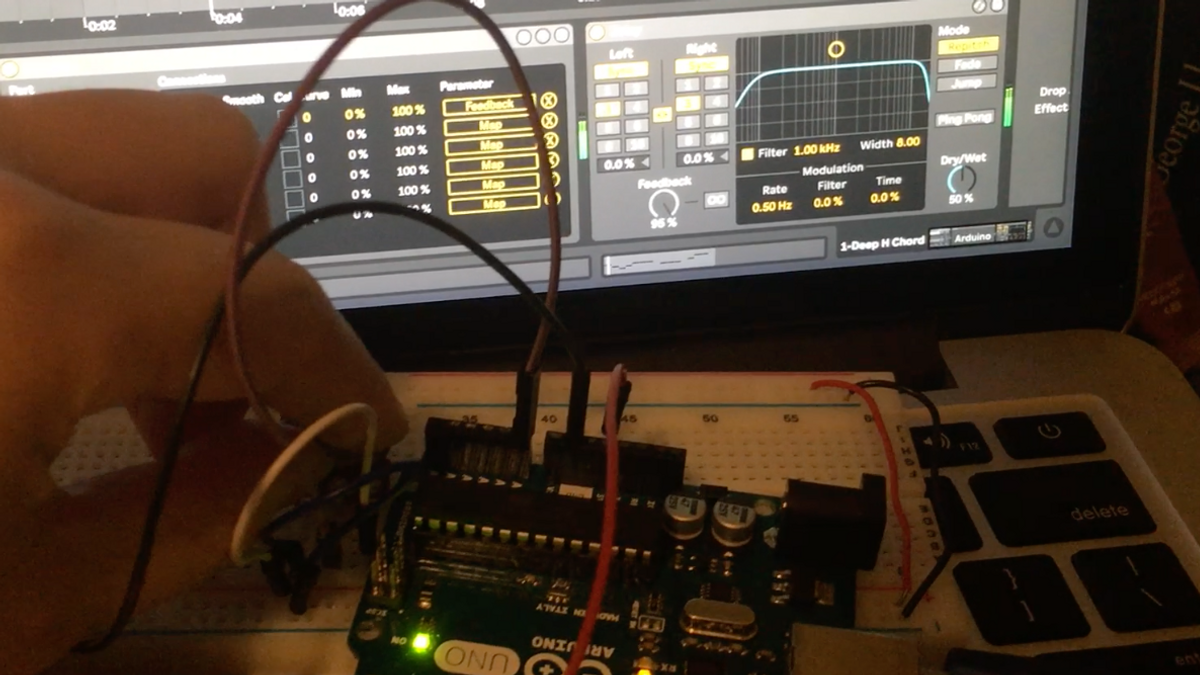
In my second attempt, I tried with Arduino Uno. It turned out the code was explicitly made for the Arduino Uno. After changing the board it worked perfectly well. I played around by mapping potentiometer values to different parameters in Ableton.
One takeaway is in order to use capacitive sensors or ultrasonic sensors, I needed to fix the original code that communicates with Firmata. I left this for future work since I am not familiar with the Firmata protocol yet.